Tutorial: Planyo set-up (1 / 3)
Tutorial Table of Contents
part 1: Adding a new planyo sitepart 2: Adding a new resource
part 3: Setting site properties
Part 1 of 3: Adding a new planyo site
In this tutorial we will show you, step by step, how to set up Planyo as your reservation system. Planyo is a very flexible system adapted to very different kinds of needs -- ranging from yacht charters, tennis court reservations, hotels & vacation apartments to driving schools, doctor appointments and conferences. For some of these applications you can use dedicated sites such as tennis.planyo.com or yacht.planyo.com (or use one of the icons on the homepage). For other applications, e.g. conferences, concerts, parking lots etc. you can simply use the main site (planyo.com).
Everything that can be reserved (yachts, tennis courts, cars, seats, beds, rooms or appointments with instructors, doctors, therapists etc.) is called a resource in planyo. A group of related resources (e.g. different boats of the same company, all rooms in a hotel, all driving instructors in a driving school etc.) is called a planyo site.
To get started, you'll need to create a planyo account. You'll find the link on top of every planyo page, called 'sign up'. Once logged in, at the bottom of your user page you see a list of your sites with a link to add a new one.

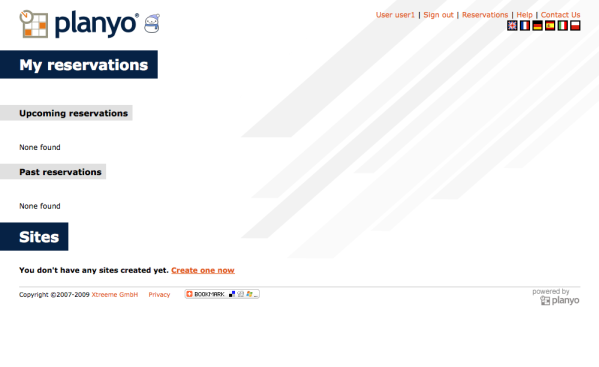
Fig 1. A new site can be added from your account page. In the first step you'll need to specify the name and type of your site. The name should be usually the same at that of your business and the type should either match one of the predefined types or custom. It's best not to use the predefined types if they don't fit exactly your business type.
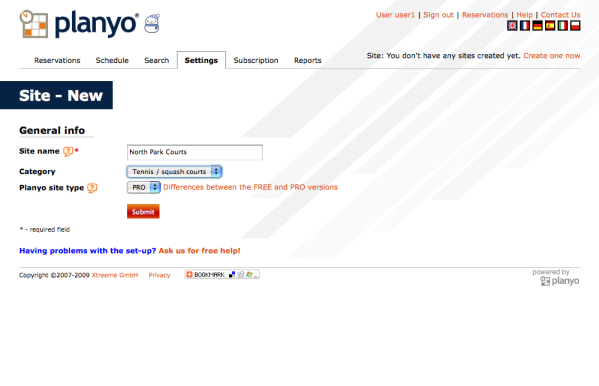
Fig 2. First step - creating a new planyo site. After clicking 'submit' you are taken to the admin panel. From now on this panel will always appear whenever you log into your planyo account. Before we go through the different sections of the admin panel, let's add our 2 tennis courts. Clicking on 'add new court' takes you to the following page:

Fig 1. A new site can be added from your account page. In the first step you'll need to specify the name and type of your site. The name should be usually the same at that of your business and the type should either match one of the predefined types or custom. It's best not to use the predefined types if they don't fit exactly your business type.

Fig 2. First step - creating a new planyo site. After clicking 'submit' you are taken to the admin panel. From now on this panel will always appear whenever you log into your planyo account. Before we go through the different sections of the admin panel, let's add our 2 tennis courts. Clicking on 'add new court' takes you to the following page: