Tutorial: Creating reports (4 / 5)
Tutorial Table of Contents
part 1: Standard report typespart 2: Special report types
part 3: Delivery by email
part 4: On-demand reports with custom settings
part 5: Customizing reports
Part 4 of 5: On-demand reports with custom settings
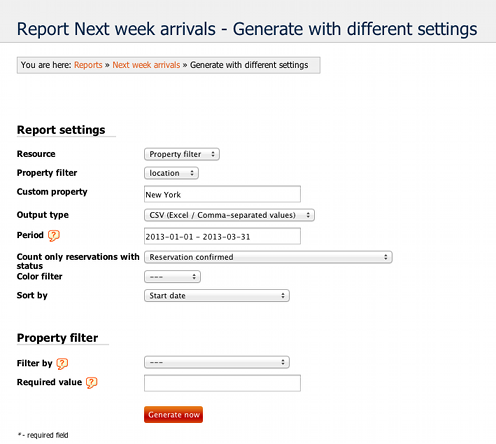
Once you have a report created and saved, you can always very quickly access it in the dashboard. If you click the Different settings link under the report name, a Generate with different settings window will open.

Here you can very conveniently generate a saved report with slightly different settings, usually you will want to change the period of the report. Here you won't see a drop down (like in report settings) but a text field. This is because the period entered here can be very flexible. The syntax is very flexible, there are many possible ways to enter a period for the report, including:
Besides the period, you can change the other filters, such as the resource/resources included, status, color, or form item values.

Here you can very conveniently generate a saved report with slightly different settings, usually you will want to change the period of the report. Here you won't see a drop down (like in report settings) but a text field. This is because the period entered here can be very flexible. The syntax is very flexible, there are many possible ways to enter a period for the report, including:
- 2013 - will give you a report for the entire year
- June 2013 - one month
- next month - another way to get an entire month (last, this, next can be used)
- last week - last, this, next can be also used with the word week
- today - today, yesterday, tomorrow can be used for a single day
- 2013-01-01 - 2013-03-31 - lets you define a specific date range. You can use a number of date formats, including June 1 - June 10 etc.
Besides the period, you can change the other filters, such as the resource/resources included, status, color, or form item values.