Tutorial: Finding your way around the administration panel (2 / 6)
Tutorial Table of Contents
part 1: Reservations tabpart 2: Reservation details
part 3: User details
part 4: Schedule tab
part 5: Search and settings tabs
part 6: Subscription and reports tabs
Part 2 of 6: Reservation details
Reservation details
The reservation details view can be accessed by clicking on the reservation ID anywhere it's displayed, specifically in the reservations, schedule and search tabs of the administrative panel.
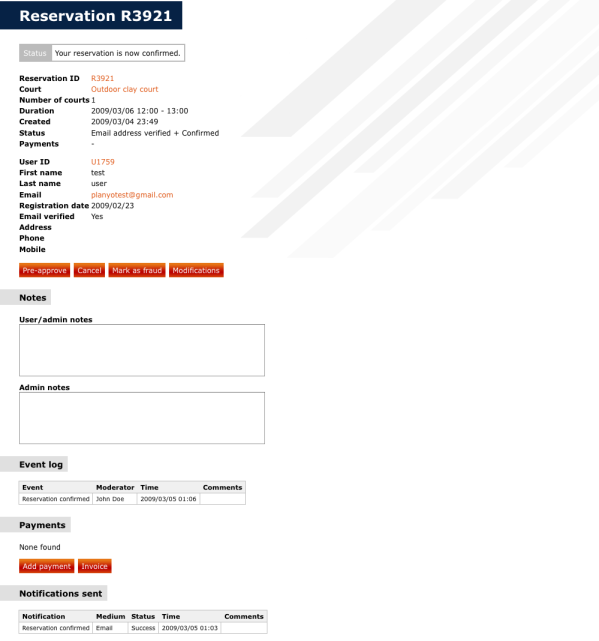
Fig 2. Reservation details In the top section you'll see the status of the reservation, as seen by the client. Then there are details of the reservation and of the client who made the reservation. Clicking on the User ID will take you to the user details view (described below). Underneeth the details you'll see action buttons:
- Pre-approve - If you trust a client, by pre-approving them, you can have all their future reservations automatically confirmed by the system.
- Confirm / cancel - These two buttons allow you to either confirm (accept) or cancel (reject) the booking.
- Mark as fraud - This rejects the reservation and bans the user from making future reservations. The user is identified by the email address
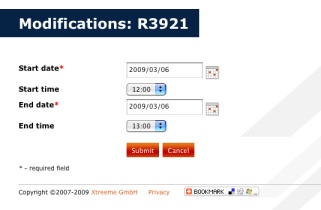
- Modifications - This button allows you to modify the reservation. It's very useful if for example the client calls and wants to either change the time of the rental or wants to use a different resource.

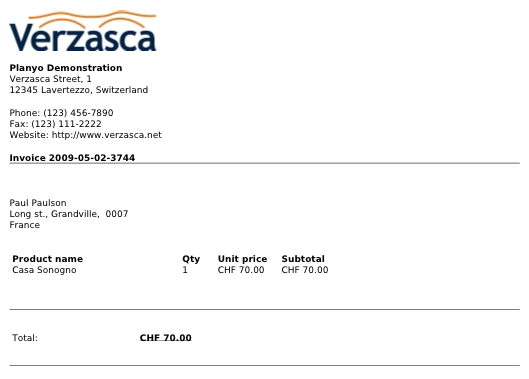
Fig 3. Modifying reservation details Below the action buttons you'll find notes: the first box (user/admin notes) is visible both by the client (if they have an account) and by the administrators so it can be used to leave any notes related to the reservation by both the client and the admin. The next box (admin notes) is only visible by the administrators. Here you can add private remarks, never visible to the client. Further down are logs of events and notifications. The notification log shows which emails/faxes/SMSes have been sent to the user. The event log shows all user and administrator actions related to the booking (reservation done/confirmation/cancellation etc.). The payments section shows the payments related to the booking. In case you choose to accept credit cards online through Planyo, these payments will be automatically recorded here. In case the client pays using other methods (e.g. cash) you can manually enter the payment into the system here. Please note that this is only for your records and this functionality doesn't have to be used at all. In the payment section you'll also find the invoice button. Here you can download/print out the invoice (in the PDF format) if you wish. The invoice will contain all entries, including rental, additional products selected by the client as well as optional hidden products such as cleaning costs or daily tax for staying in the area. The invoice uses the settings you entered in the settings tab, such as your company logo and address, currency, tax rate etc.

Fig 4. Sample invoice (PDF)