Tutorial: Setting up a multi-step manual reservation process including a price quotation sent to the customer, upload of signed contract, manual confirmation and online payment (3 / 7)
Tutorial Table of Contents
part 1: Overview of the reservation process usedpart 2: Price offer / quotation
part 3: Contract signing
part 4: Manual confirmation
part 5: Online payment
part 6: Offline payment and delayed notification
part 7: Check-in and check-out
Part 3 of 7: Contract signing
This step involves automatic creation of a contract (as a PDF document) sent to the customer for signing. The customer then scans the signed contract and uploads it using the link sent in the initial new reservation email.
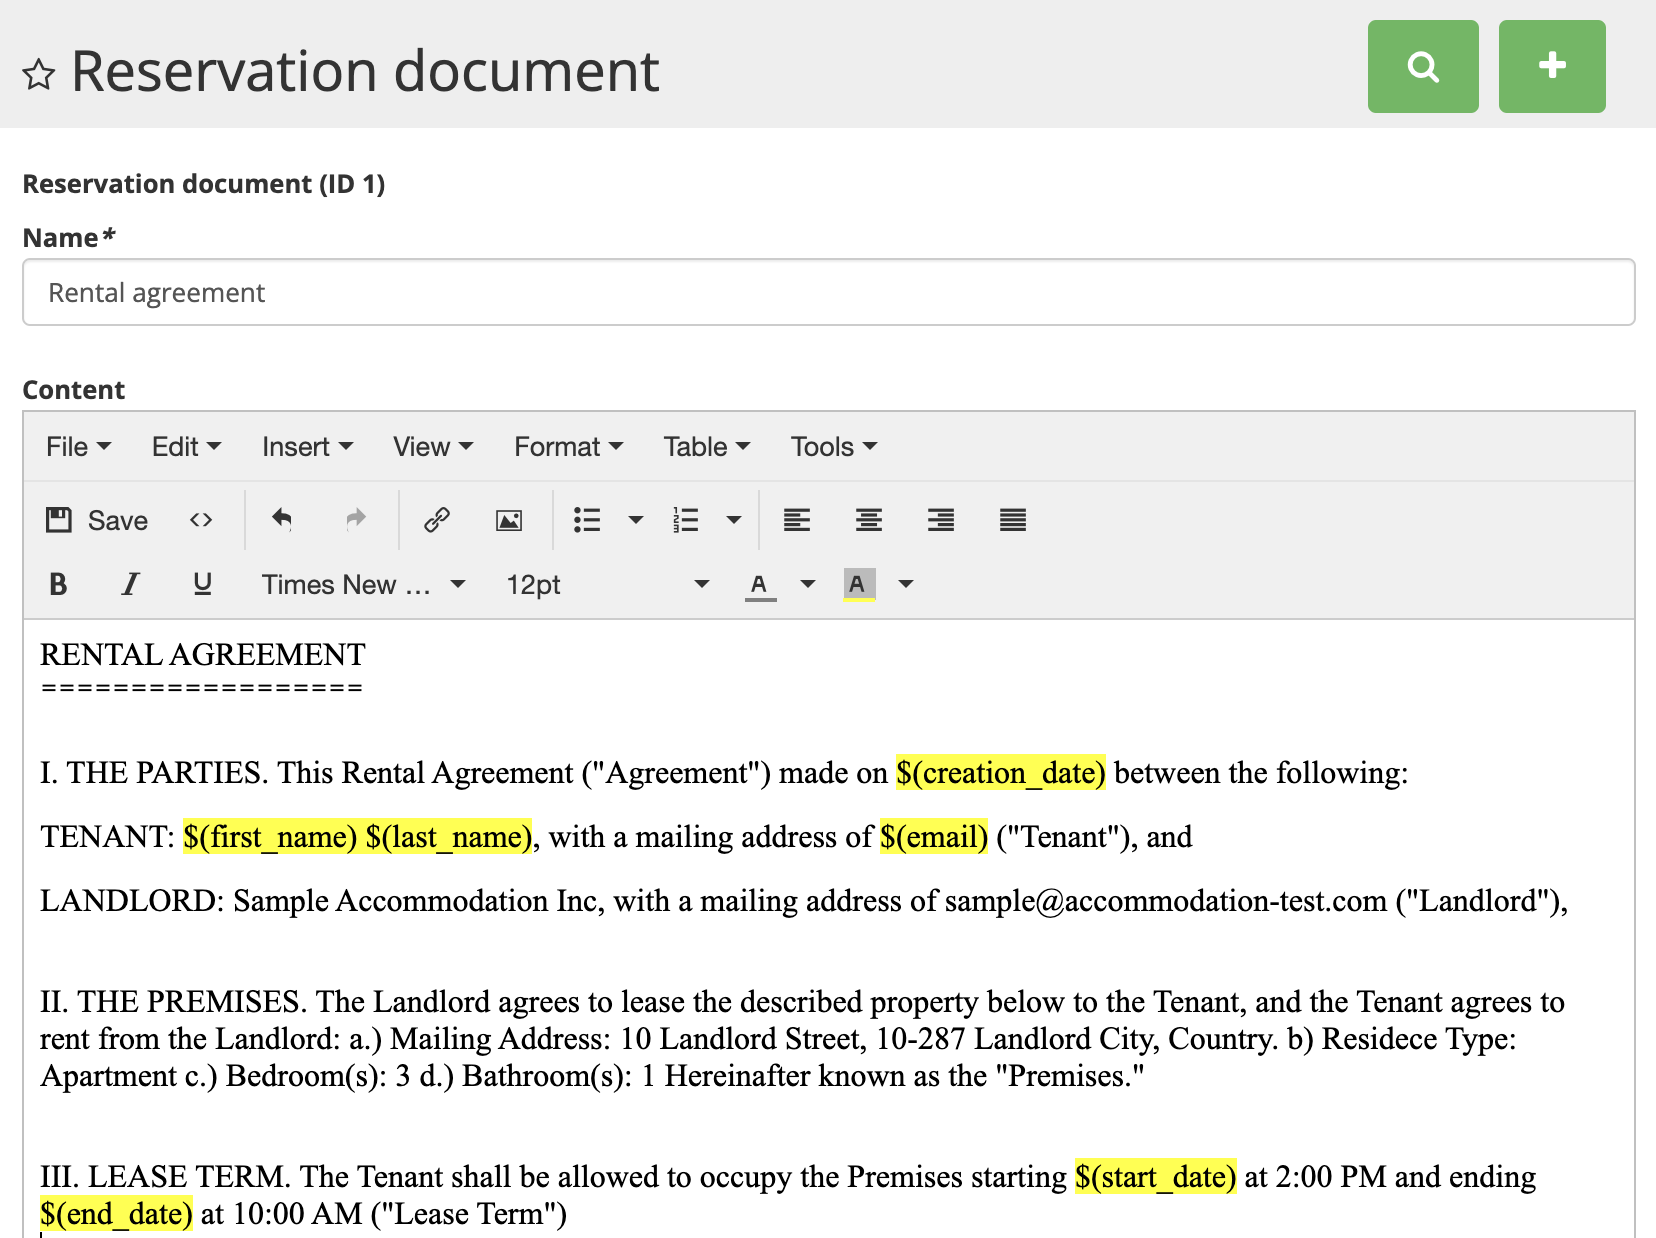
The contract should be created by adding a new reservation document. Click [Add reservation document] on the Templates page.

The contract will be created automatically using the data from the reservation entered into the system, including customer's personal data, the reserved resource and it's price, period etc.
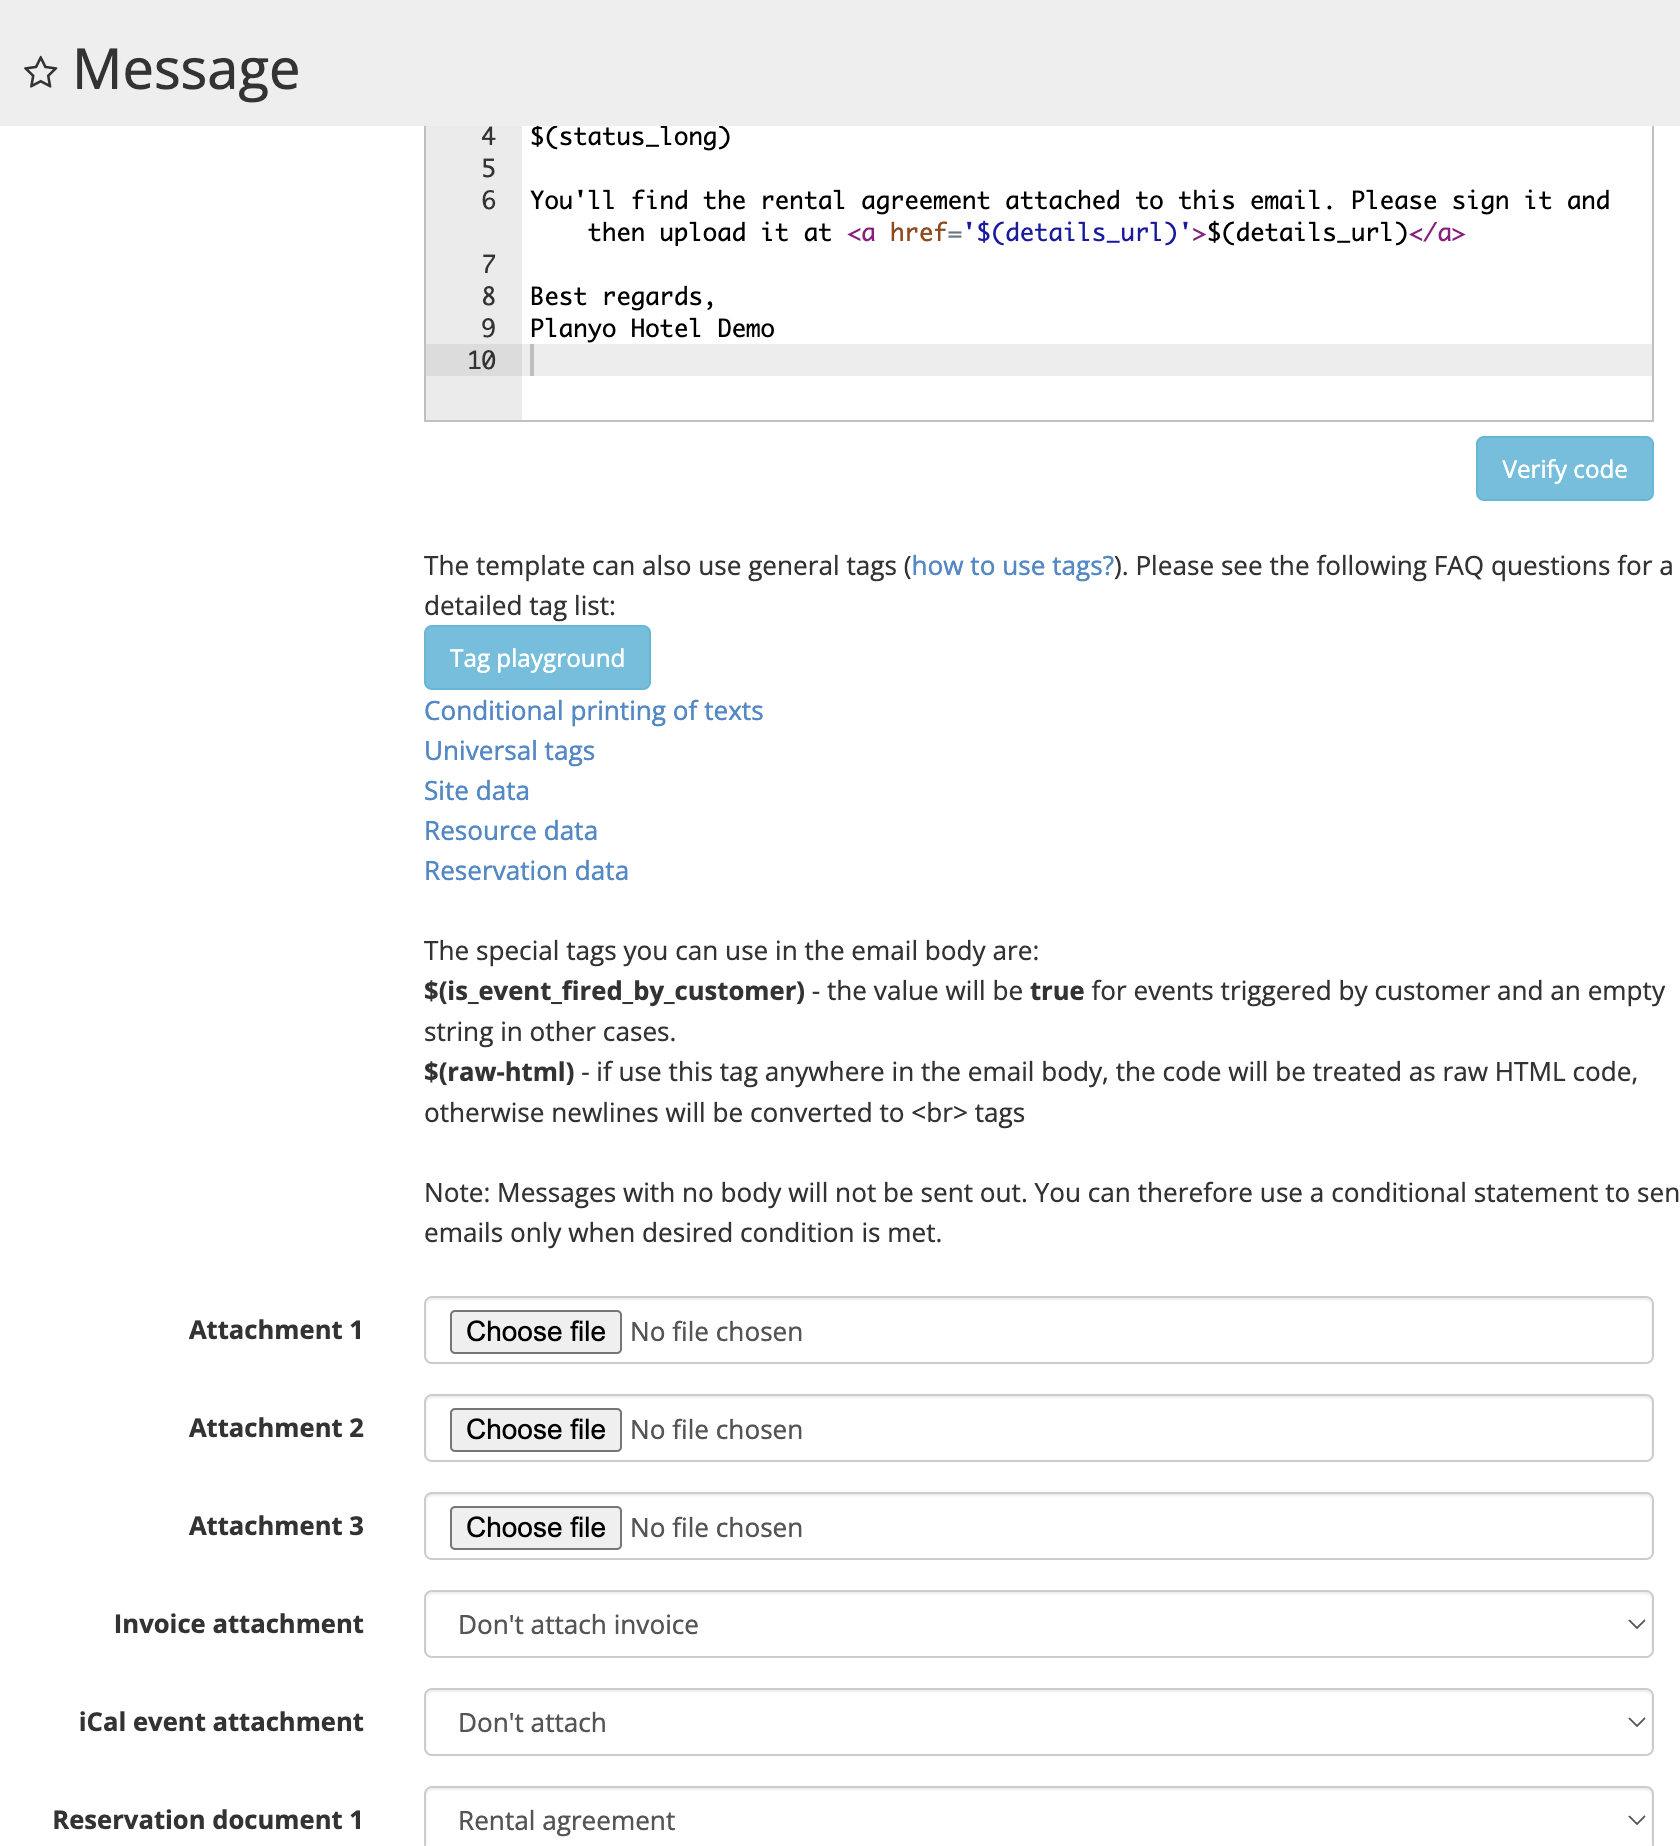
In order to allow the customer to upload the signed contract, we'll use the extension Storage of custom reservation documents. An alternative to this approach would involve signing the contract electronically or having the customer create a digital signature directly on the reservation form. These other solutions are much simpler and are explained in Q379. Now we'll need to modify the new reservation entered notification on the Notifications page where we'll include a link where the customer should upload their contract. We'll also attach the contract (rental agreement) as a PDF attachment to this email.

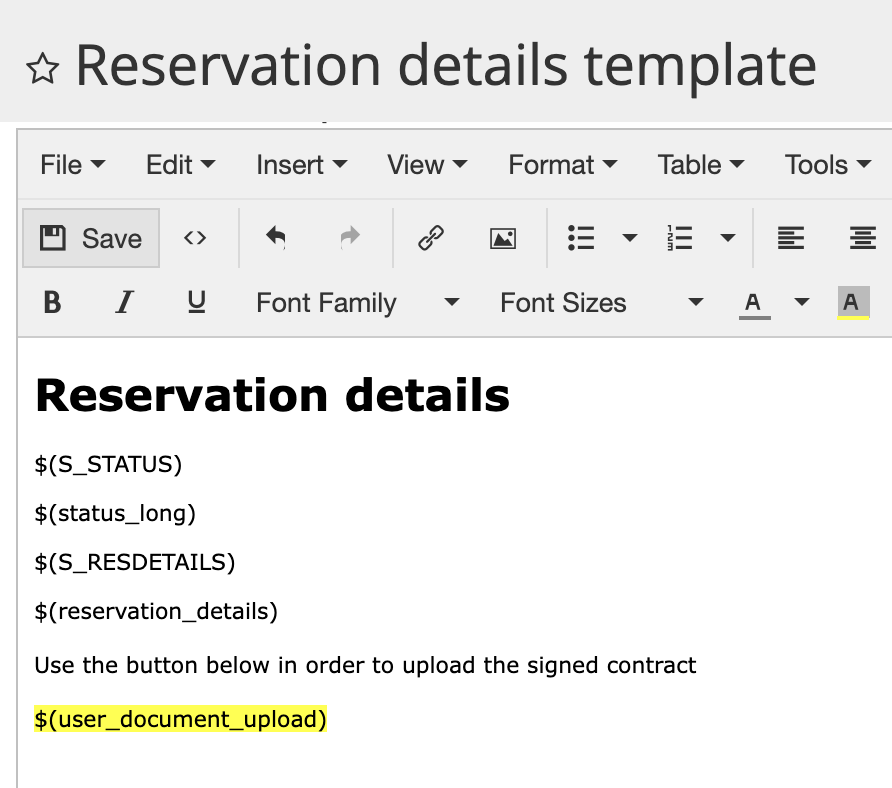
The link $(details_url) will take the customer to the reservation details page whose template you should modify (on this page) to include the tag $(user_document_upload) which lets the customer upload the signed contract.

The contract should be created by adding a new reservation document. Click [Add reservation document] on the Templates page.

The contract will be created automatically using the data from the reservation entered into the system, including customer's personal data, the reserved resource and it's price, period etc.
In order to allow the customer to upload the signed contract, we'll use the extension Storage of custom reservation documents. An alternative to this approach would involve signing the contract electronically or having the customer create a digital signature directly on the reservation form. These other solutions are much simpler and are explained in Q379. Now we'll need to modify the new reservation entered notification on the Notifications page where we'll include a link where the customer should upload their contract. We'll also attach the contract (rental agreement) as a PDF attachment to this email.

The link $(details_url) will take the customer to the reservation details page whose template you should modify (on this page) to include the tag $(user_document_upload) which lets the customer upload the signed contract.
